
How to Prepare Your Quilt
for Longarm Quilting
At Peas In A Pod Quilting in McDonough, Georgia, here's exactly what we ask you to do before sending your quilt. It's simpler than it looks, I promise.
1. IRON
Give your quilt top a good iron. It doesn’t matter if your seams are pressed open or to the side; they just need to be flat. This helps reduce bulk and makes the final quilt smooth.
Clip away any loose threads. If your quilt has appliquéd pieces or any extra embellishments, make sure they are secured properly so that they don’t get caught in the machine.


2. Stay-stitching
This one's optional, but honestly? Worth doing. Especially if you have bias edges anywhere on the outside. To do a stay stitch, you simply sew a straight seam approximately ⅛” in from the edge all around the perimeter of the quilt top.
3. Measure
Heads up: your finished quilt top is almost never the same size as what the pattern says. Measure it yourself — you'll need the real numbers so that you know exactly how much backing and batting you need to provide.
This is super easy: Measure straight down the middle; both horizontally and vertically. Write these measurements down for later.


4. Mark
If your quilt is directional, or you want one side to be the top, please designate this. The easiest way to mark the top is with a safety pin on the top edge of the quilt front and a safety pin on the top edge of the back.
5. Backing
Your backing should have at least 4 inches extra on EACH side (8 inches horizontally and 8 inches vertically). This allows enough room to pin the quilt onto the frame.
If you are piecing your backing it is best to have the seam running horizontally. Horizontal seams prevent your quilt from sagging on the frame.
Square up your backing fabric — if you're not sure how, feel free to email and ask me. Squared-up backing loads straight onto the frame, which means the design on your backing fabric will line up like you intended.

6. Batting
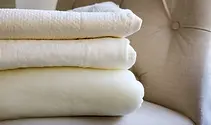
If you purchase your batting from me and I will make sure there is enough to load it properly. This is usually the most affordable option for cost and saved shipping fees (yay! more money left for fabric!). You can see what batting I offer on my Services page.
If you choose to send your own batting, please keep in mind that it should be at least 3” larger on all sides, just like the backing.
7. Shipping
Once your top, backing, and batting are ready, fold them up and place them in a plastic bag. Something as simple as a garbage bag will work for this. The plastic bag is your protection from rain, snow, or anything wet.
Before you ship, be sure you have filled out the Longarm Quilting form or reached out to me directly to plan out your repair or t-shirt quilt. Upon receiving that form or communication, I will provide the shipping address.
I like to use Pirate Ship as they have discounted rates.
